Miniature Binder Tutorial ~ Donated by Elaine Usimaki
|
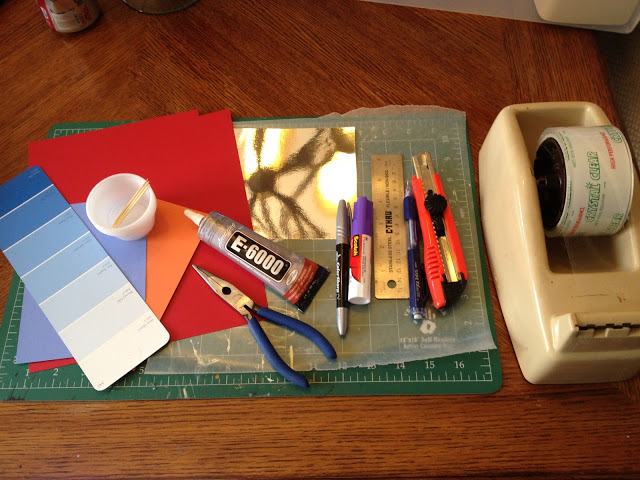
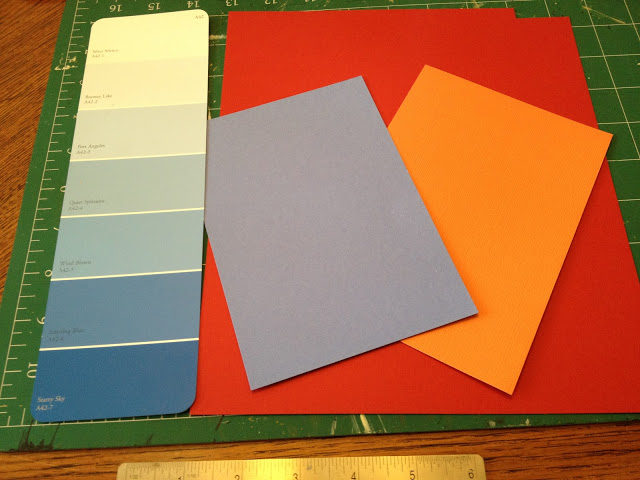
Supplies:
|
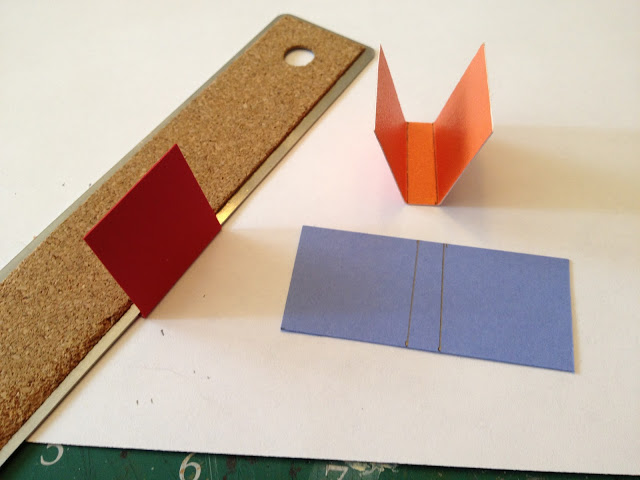
You can use poster board, card stock, scrapbook card or paint sample cards. Note: paint sample cards may have writing on the back, so you'll want to plan to cover the printed backside or make closed binders with them.
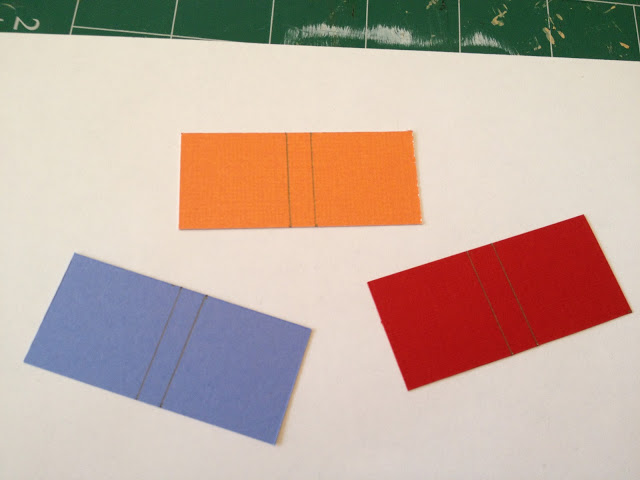
Cut card stock to 2 1/4" wide x 1" high. On the wrong side of the card stock measure in 1" on each side and make a line. This should give you 1/4" in the center to be the binder's spine.

|
|
Pre-fold on marked lines to make the binder folds. Use a metal ruler to make neat, crisp folds. Then open flat.
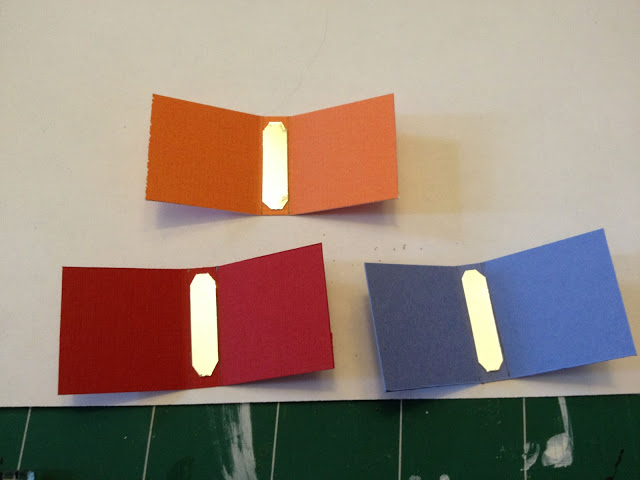
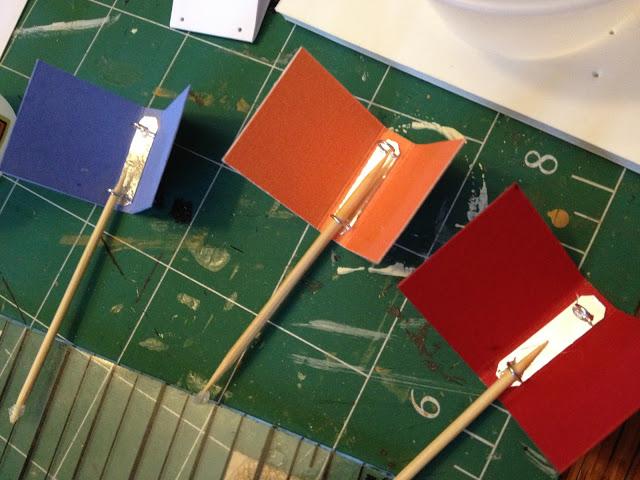
Cut a piece of metallic poster board 7/8" high x 3/16" wide. Aluminum foil or foil tape may be substituted. Clip the corners a bit to round them.

Glue metallic poster board piece to inside center of binder. Use metallic marker or paint to make dots on outer spine of binder to look like rivets.
|

|
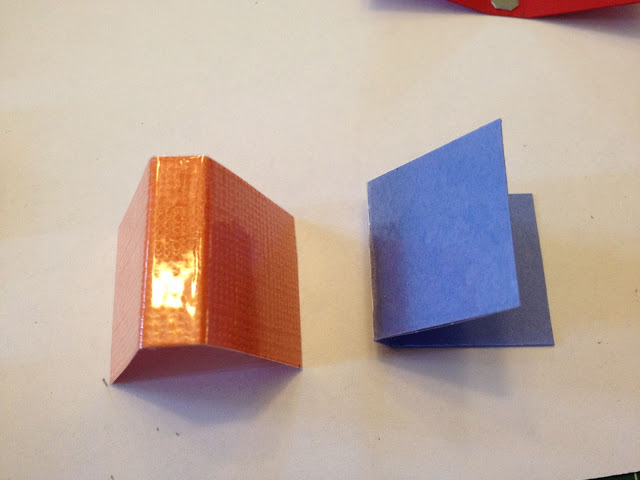
If you want binder to look glossy apply package tape to back of binder and trim. Have binder in a closed position as you apply the tape so it stays closed easier. If you plan to make an open binder, skip applying the tape.
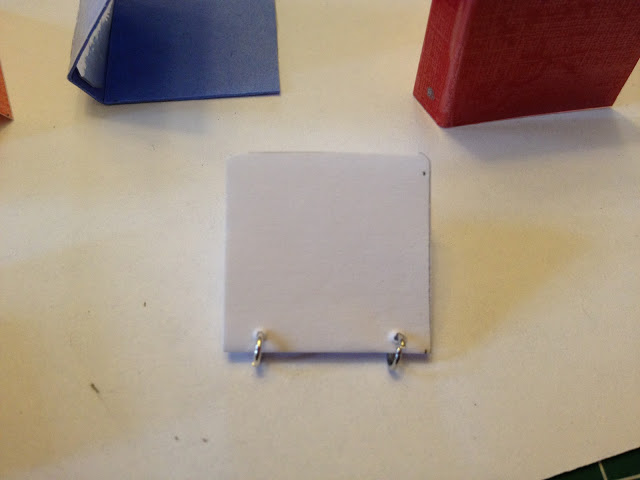
Cut several pieces of white paper into 7/8" x 7/8" pieces. These will make the index dividers. Poke holes in the side and add jump rings to hold the paper.
|
|
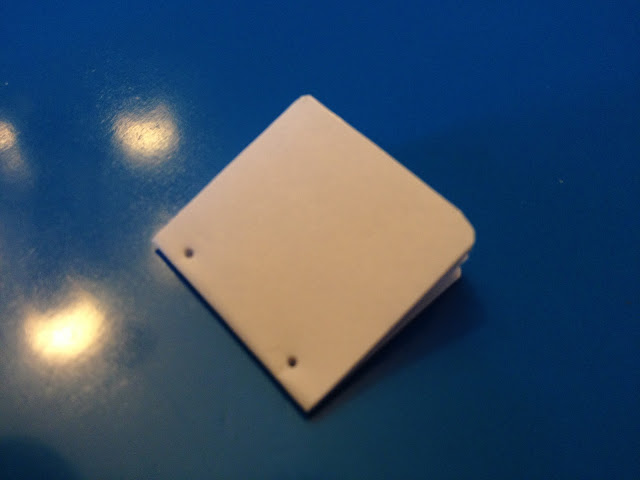
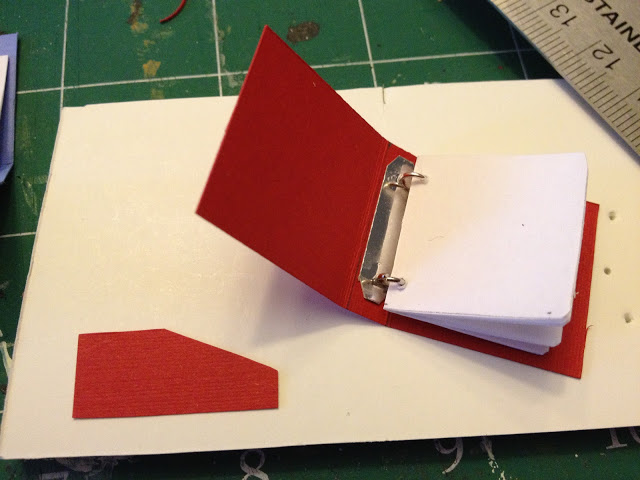
Glue paper and jump rings into binder, positioning jump rings over metallic piece. Use the E-6000 glue for this. Let the glue dry. If binder will be closed, glue 2 jump rings onto metallic piece and position with toothpicks until dry. Then glue binder shut. It can be empty, or you can cut small pads of scratch paper to glue inside before gluing binder shut to make it look full of papers.

|
|
To create an inside pocket, cut a piece of matching card stock 7/8" wide x 3/8" high. Trim a corner as shown in the photo, then glue sides and bottom of pocket to inside binder. Leave top of pocket open. Add assorted styles and colors of scraps of paper in pocket.
Cut tiny strips of color velum and glue between the pages as shown to create dividers. Trim velum away, leaving just the divider part showing.

|

|
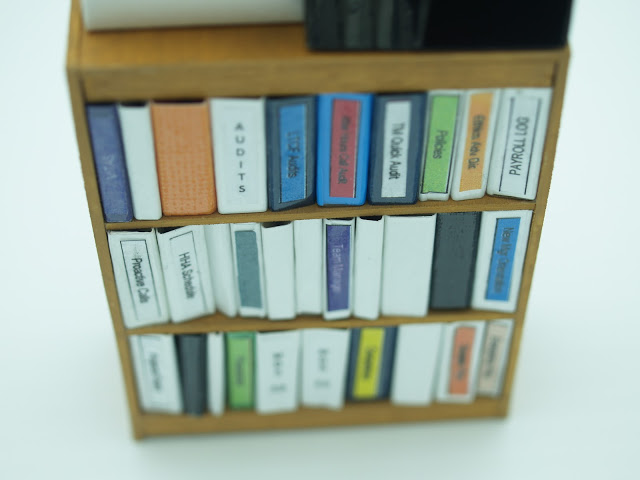
Create different looks for your binder. Add lined paper, large divider pocket, labels, and you can add graphics or patterns to the front of binder before covering with package tape. Create many and add labels from your computer to fill a bookshelf or stack in a chair or on a floor. There are so many uses for binders - be sure to make extras!

|
|

|