Miniature Dollhouse Candle Tutorial
Bonus Video Tutorials at the bottom of this page ~ More Miniature Candles
Personal Use Only Please
|
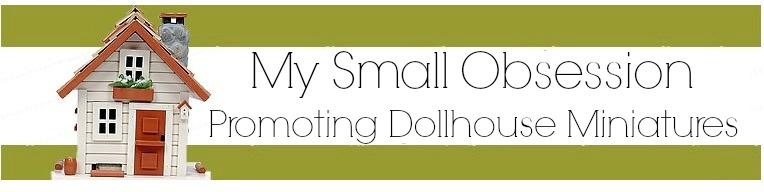
Supplies:
|
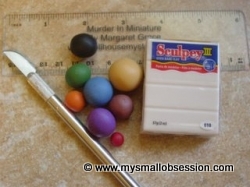
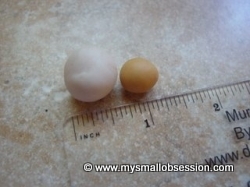
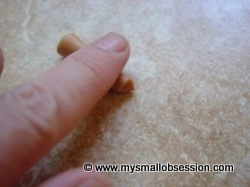
Mix colored clay with translucent clay, use the proportions in the picture as a guide, the more translucent clay added, the more translucent the candle will be. I used Sculpey brand clay for this demonstration but I have found that Fimo gives more translucence to the candles. Roll clay into a log approx. 1/2 inch thick.Use a sharp blade to make a clean cut in the clay, this clean cut end is the top of the candle.
|
|
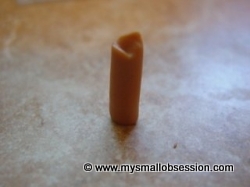
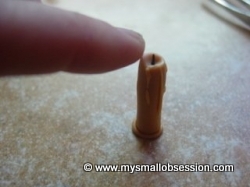
Begin rolling the log, notice the clean cut end begins to dimple in. Roll to desired length and cut to size, do not cut the dimpled end. Stand candle up and flatten bottom. Trim more if needed.
|
|
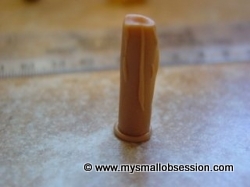
Roll out a very thin snake of clay, about 1mm thick, this will be the "dripped" wax. Taper one end of the snake. Gently press the tapered end of the snake of clay against the top of the candle. Gently pull towards bottom of candle and taper off the end. Continue adding "dripped wax" until you achieve the look you want. Roll out another thin snake of clay and wrap it around the bottom of the candle to achieve a "puddle of wax".

|

|
|
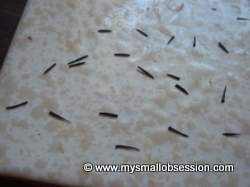
Roll a snake of black colored clay as thin as you can get it. Cut into pieces about 1/4 inch long and taper one end slightly. Bake at approx. 250 degrees for about 5 minutes. Let cool, these will be the "wick". Place "wick" into center of candle. Bake candle at approx. 250 degrees for about 15 minutes. Let cool
|
|
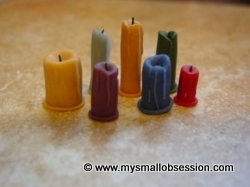
Use your imagination to create many different kinds of candles. Experiment with different sizes, shapes and colors. With many colors available in polymer clay, the possibilities are endless! Have fun!

How To Make Miniature Dollhouse Candles Video Tutorials
Playlist includes 7 tutorials ~ To watch the tutorials just click the arrow on the video above, each tutorial will play automatically. To skip ahead, click the "next arrow" on the video bar and click through to the video you want to see.