Miniature Craftsman Style Dollhouse Chandelier Tutorial
Personal Use Only Please!
|
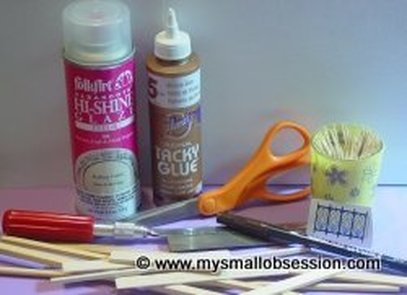
Supplies:
|
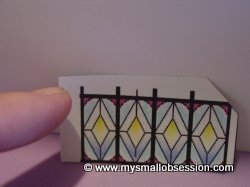
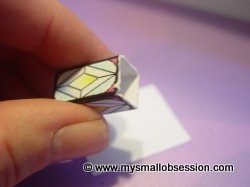
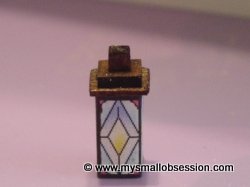
Assembling the shade ~ Visit Small Stuff's PrintMini, link provided below, choose the "shade" you want and print out on card stock. You need to print out 4, of what ever pattern you choose. Cut out your shades making sure to cut off the lines on the pattern, see photo. Assemble the shade by folding along the lines to form a rectangle, glue the small tab inside and let dry.

|

|
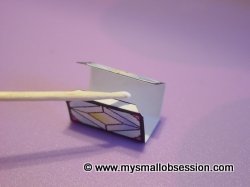
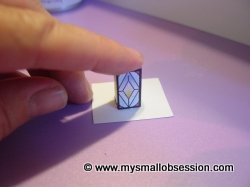
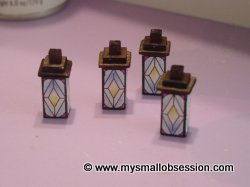
After assembling all of your lanterns, use a paint pen or marker to fill in any white showing. Cut out a small piece of card stock, apply a small amount of glue to the edges of one end of your shade. Gently press the shade onto the card stock and wipe any excess glue. Let dry. Once dry, carefully cut around the edge of the shade. Repeat the steps above with the other three shades.
|
|
|
|
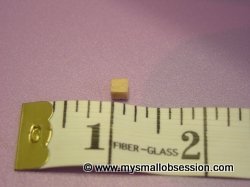
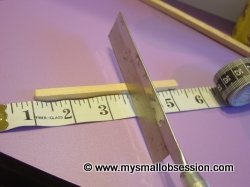
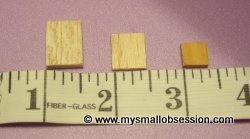
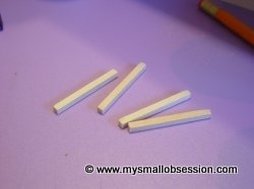
Cut the following pieces of scrap wood, according to the photos below. Approx. 1/2", 3/8" and 1/8"
Some of these pieces will be used for your shades and the others will be used in the chandelier base.
The largest piece should be a bit bigger than your shade.
Some of these pieces will be used for your shades and the others will be used in the chandelier base.
The largest piece should be a bit bigger than your shade.
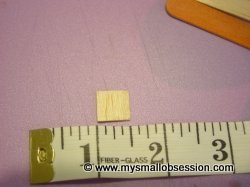
Cut 6 ~ 1/2" x 1/2"
|
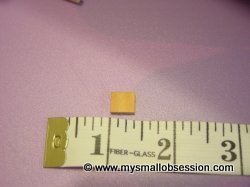
Cut 7 ~ 3/8" x 3/8"
|
Cut 5 ~ 1/8" x 1/8"
|
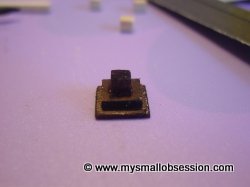
Color your remaining pieces of cut wood with your paint pen or stain and allow to dry. Once dry, glue the pieces together using the photo below as a guide. Make one for each shade plus one for the chandelier base, 5 total.

|
|
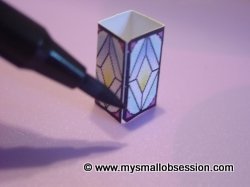
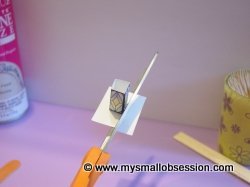
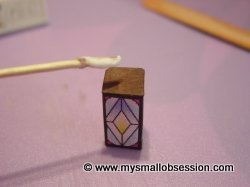
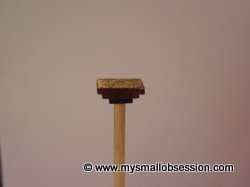
Glue the wood to the top of the shade and allow to dry. Repeat with remaining shades.
|
|
|
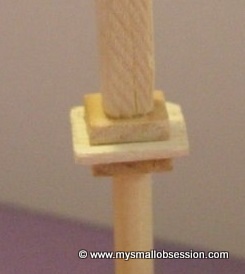
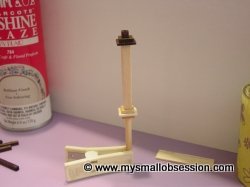
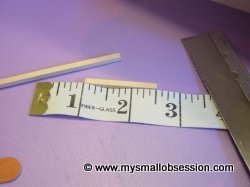
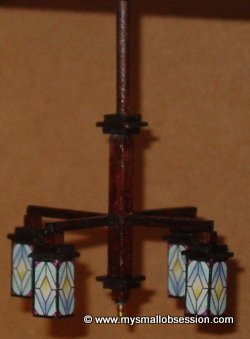
I am not going to give measurements/accurate measurements, for the next several steps. My original chandelier had to be cut down to fit....I forgot to adjust my measurements for the chandelier to hang over a table, so it ended up being too long with my original measurements. You will need to adjust this to your own specifications to fit your room. I used a ruler in the photos only as a visual guide. I cut a piece of Bass wood & a piece of round dowel, approximately 2 and 1/2 inches long each. Sand until smooth and color with paint pen or stain. Use your clothes pin or clamp to hold the round dowel and glue each piece on, letting dry between each addition. Use the photo as a guide for the order of placement. This will be the "base" that holds the chandelier.
|
|
|
Cut three pieces of scrap wood in graduated sizes. See photo below for approximate sizes. Sand, stain and glue together. Once dry this will be glued to the end of the round dowel on the chandelier base, see photo below.
|
|
Cut four pieces of 1/8" bass wood, approx. 1 1/2" long. These will be the "arms" that will hold the shades onto the base.
|
|
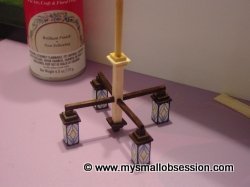
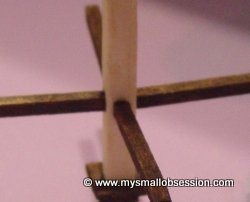
This part is tricky and I don't have a good photo of the step so hang in there. At this point all of your wood should be painted/stained. Take the base and decide where to make small holes in the square piece of bass wood. I made my holes so the shades were even with the bottom part of the base when standing. I gauged where to place the holes for the chandelier arms by placing the lanterns under each arm. View photo below. The wood should be very soft and easy to just press one of the chandelier arms into, to make your hole. Don't press too hard, just enough to insert the arm slightly. Do this on all four sides making sure to line up even all the way around. Do NOT glue them in yet.
|
|
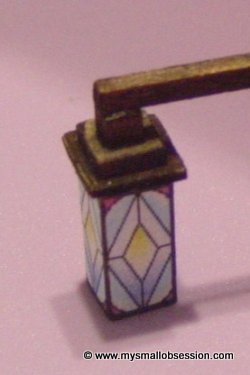
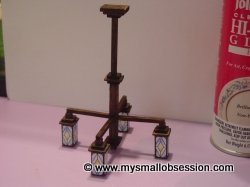
Glue one of the arms to a shade and allow to dry. Repeat with remaining shades. After they are all dry, line up the arms with the holes you made earlier and glue arms in place and allow to dry.

|
|
|
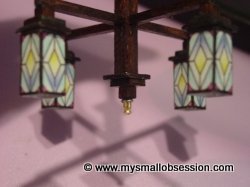
Once everything is dry, glue a bell shaped earring back to the base and allow to dry. Once glue has dried, spray entire chandelier with gloss sealer and let dry.
That's it, hang in your dollhouse and enjoy!
DIY Miniature Dollhouse Lamps
Video tutorials for seven different lamps & lighting, working and non-working.